背景:为什么选择 NestJS?
作为一名前端 GIS 开发工程师,最近在开发一个小项目时需要搭建后端服务。虽然之前用过 Express 框架,但在工作中发现许多 Node.js 后端项目都在使用 NestJS 框架。借此机会,我决定深入学习 NestJS,探索这款框架如何提升后端开发效率。
Nestjs框架简介:企业级 Node.js 开发的最佳拍档
NestJS 是一个基于 TypeScript 的企业级 Node.js 后端框架,它结合了 Express 的灵活性和现代后端框架的最佳实践,特别适合构建可扩展、可维护的应用程序,堪称中大型项目的理想选择。
Nestjs核心架构:清晰分层的工程化设计
NestJS 采用了清晰的分层架构,主要包含以下核心层次,每个层次各司其职,让代码结构一目了然:
Controllers(控制器层)
- 处理 HTTP 请求(支持REST/GraphQL/WebSocket等多种协议)
- 定义路由和请求 / 响应格式
1
2
3
4
5
6
7
| @Controller('users')
export class UsersController {
@Get(':id')
getUser(@Param('id') id: string) {
return this.usersService.findById(id);
}
}
|
Services(服务层)
- 封装核心业务逻辑
- 通过依赖注入机制被控制器调用,解耦组件关系
1
2
3
4
5
6
7
8
| @Injectable()
export class UsersService {
constructor(private userRepo: UserRepository) {}
findById(id: string) {
return this.userRepo.findOne(id);
}
}
|
Repositories/Providers(数据层)
- 负责与数据库交互(支持 TypeORM/Prisma/Mongoose 等多种 ORM)
- 处理外部 API 调用
1
2
3
4
| @Injectable()
export class UserRepository {
constructor(@InjectRepository(User) private repo: Repository<User>) {}
}
|
Modules(模块化组织)
- 将相关功能封装为独立模块,提升代码复用性
- 通过
imports和exports控制模块间的可见性
实战:从零搭建 NestJS 项目
1. 官方文档:最权威的学习指南
学习新技术的最佳起点是查阅官方文档。NestJS 提供了完善的中文文档,一站式获取所有开发资源:https://nest.nodejs.cn
2.创建一个Nest项目:3 步启动开发环境
注意:开始之前,请确保你的系统有Node.js 20 以上版本的nodejs环境
第一步:全局安装 NestJS 脚手架
第二步:创建新项目(以nest-demo为例)
第三步:启动开发服务(支持热更新)
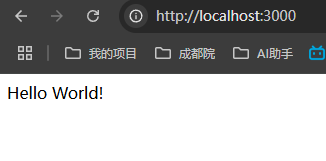
浏览器访问localhost:3000,看到 “Hello, World!” 即表示项目启动成功:
3. 连接数据库:使用 Prisma ORM 简化数据操作
NestJS 中推荐使用 ORM 技术操作数据库,我选择Prisma作为 ORM 框架,它能让数据库操作像操作对象一样简单直观。
什么是 ORM?
ORM(对象关系映射)是一种编程技术,它在面向对象编程语言和关系型数据库之间建立映射关系,让开发者可以用操作对象的方式操作数据库,而无需直接编写 SQL 语句。
3.1 安装与初始化 Prisma
进入项目目录并安装 Prisma 依赖:
1
2
| $ cd nest-demo
$ npm install prisma --save-dev
|
初始化 Prisma 配置:
此命令创建一个新的 prisma 目录,其中包含以下内容:
schema.prisma:指定你的数据库连接并包含数据库架构.env:dotenv 文件,通常用于将你的数据库凭据存储在一组环境变量中
3.2 配置数据库连接(以 PostgreSQL 为例)
在schema.prisma文件中设置数据库连接:
1
2
3
4
5
6
7
8
| generator client {
provider = "prisma-client-js"
}
datasource db {
provider = "postgresql"
url = env("DATABASE_URL")
}
|
在.env文件中修改数据库连接参数,需要替换USER、PASSWORD、HOST、PORT、DATABASE五个参数
1
| DATABASE_URL="postgresql://USER:PASSWORD@HOST:PORT/DATABASE?schema=public"
|
如果要连接Mysql,请参考官方教程:https://nest.nodejs.cn/recipes/prisma#%E8%AE%BE%E7%BD%AE%E6%95%B0%E6%8D%AE%E5%BA%93%E8%BF%9E%E6%8E%A5
3.3 定义数据库表结构
在schema.prisma文件中定义数据表结构,以下是一个用户表的示例:
1
2
3
4
5
6
| model User {
id Int @default(autoincrement()) @id
email String @unique
name String?
posts Post[]
}
|
定义好表结构后,生成 SQL 迁移文件并应用到数据库:
1
| $ npx prisma migrate dev --name init
|
最后,安装并生成 Prisma Client:
1
| $ npm install @prisma/client
|
💡 关键说明:
Prisma Client 将为数据模型(数据表)生成对应的CRUD方法,如findAll、create、update等
在安装过程中,Prisma 会自动调用一次 prisma generate 命令。将来,你需要在每次更改 Prisma 模型后运行此命令以更新生成的 Prisma 客户端。
prisma generate 命令读取你的 Prisma 架构并更新 node_modules/@prisma/client 内生成的 Prisma 客户端库。
4.实现 CRUD 接口:构建完整的用户模块
4.1 创建用户模块(模块化组织代码)
1
2
3
4
5
6
7
8
9
10
11
|
import { Module } from '@nestjs/common';
import { UserController } from './user.controller';
import { UsersService } from './user.service';
import { PrismaService } from '../prisma.service';
@Module({
providers: [UsersService, PrismaService],
controllers: [UserController]
})
export class UserModule {}
|
4.2 实现服务层(封装业务逻辑)
1
2
3
4
5
6
7
8
9
10
11
12
13
14
15
16
17
18
19
20
21
22
23
24
25
26
27
28
29
30
31
32
33
34
35
36
37
38
39
40
41
42
43
44
45
46
47
48
49
50
51
52
53
54
55
56
57
|
import { Injectable } from '@nestjs/common';
import { PrismaService } from '../prisma.service';
import { User, Prisma } from '@prisma/client';
@Injectable()
export class UsersService {
constructor(private prisma: PrismaService) {}
user(
userWhereUniqueInput: Prisma.UserWhereUniqueInput
): Promise<User | null> {
return this.prisma.user.findUnique({
where: userWhereUniqueInput
});
}
async users(params: {
skip?: number;
take?: number;
cursor?: Prisma.UserWhereUniqueInput;
where?: Prisma.UserWhereInput;
orderBy?: Prisma.UserOrderByWithRelationInput;
}): Promise<User[]> {
const { skip, take, cursor, where, orderBy } = params;
return this.prisma.user.findMany({
skip,
take,
cursor,
where,
orderBy
});
}
async createUser(data: Prisma.UserCreateInput): Promise<User> {
return this.prisma.user.create({
data
});
}
async updateUser(params: {
where: Prisma.UserWhereUniqueInput;
data: Prisma.UserUpdateInput;
}): Promise<User> {
const { where, data } = params;
return this.prisma.user.update({
data,
where
});
}
async deleteUser(where: Prisma.UserWhereUniqueInput): Promise<User> {
return this.prisma.user.delete({
where
});
}
}
|
4.3 实现控制器层(处理 HTTP 请求)
1
2
3
4
5
6
7
8
9
10
11
12
13
14
15
16
17
18
19
20
21
22
23
24
25
26
27
28
29
30
31
32
33
34
35
36
37
38
39
40
41
42
43
44
45
46
47
48
49
50
51
52
53
54
55
56
57
58
59
60
|
import {
Controller,
Get,
Post,
Body,
Delete,
Put,
Param,
ParseIntPipe,
NotFoundException
} from '@nestjs/common';
import { UsersService } from './user.service';
import { User } from '@prisma/client';
import { Prisma } from '@prisma/client';
import { CreateUserDto } from './dto';
@Controller('users')
export class UserController {
constructor(private readonly userService: UsersService) {}
@Get()
async findAll(): Promise<User[]> {
return this.userService.users({});
}
@Get(':id')
async findOne(@Param('id', ParseIntPipe) id: number) {
const user = await this.userService.user({ id });
if (!user) {
throw new NotFoundException(`用户 ID ${id} 不存在`);
}
return user;
}
@Post()
async createUser(@Body() userData: CreateUserDto): Promise<User> {
return await this.userService.createUser(userData);
}
@Delete(':id')
async deleteUser(@Param('id', ParseIntPipe) id: number) {
return this.userService.deleteUser({ id });
}
@Put(':id')
async modifyUser(
@Param('id', ParseIntPipe) id: number,
@Body() userData: Prisma.UserUpdateInput
) {
await this.userService.updateUser({
where: { id },
data: userData
});
}
}
|
4.4 引入到根模块
1
2
3
4
5
6
7
8
9
10
11
12
|
import { Module } from '@nestjs/common';
import { AppController } from './app.controller';
import { AppService } from './app.service';
import { UserModule } from './user/user.module';
@Module({
imports: [UserModule],
controllers: [AppController],
providers: [AppService]
})
export class AppModule {}
|
5.集成Swagger:自动生成交互式 API 文档
现代后端开发中,API 文档是协作的关键。NestJS 与 Swagger 集成后可自动生成文档,避免手动维护的麻烦。
5.1 安装 Swagger 插件:
5.2 配置 Swagger
1
2
3
4
5
6
7
8
9
10
11
12
13
14
15
16
17
18
19
20
|
import { NestFactory } from '@nestjs/core';
import { AppModule } from './app.module';
import { SwaggerModule, DocumentBuilder } from '@nestjs/swagger';
import { ValidationPipe } from '@nestjs/common';
async function bootstrap() {
const app = await NestFactory.create(AppModule);
const config = new DocumentBuilder()
.setTitle('API文档')
.setVersion('1.0')
.build();
const documentFactory = () => SwaggerModule.createDocument(app, config);
SwaggerModule.setup('swagger', app, documentFactory);
await app.listen(process.env.PORT ?? 3000);
}
bootstrap();
|
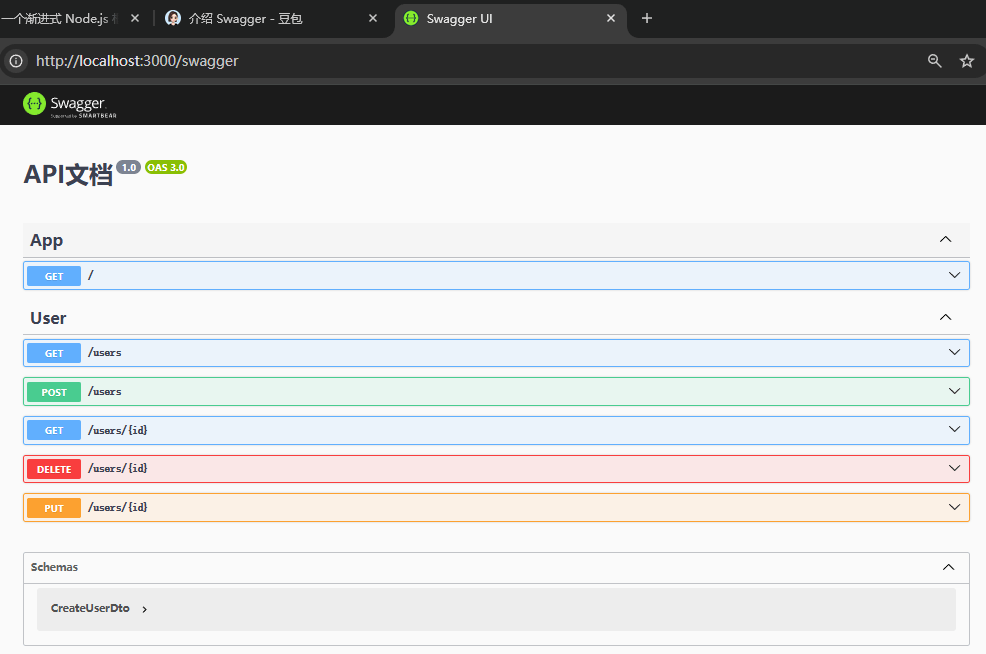
完成后,访问localhost:3000/swagger即可查看交互式文档:
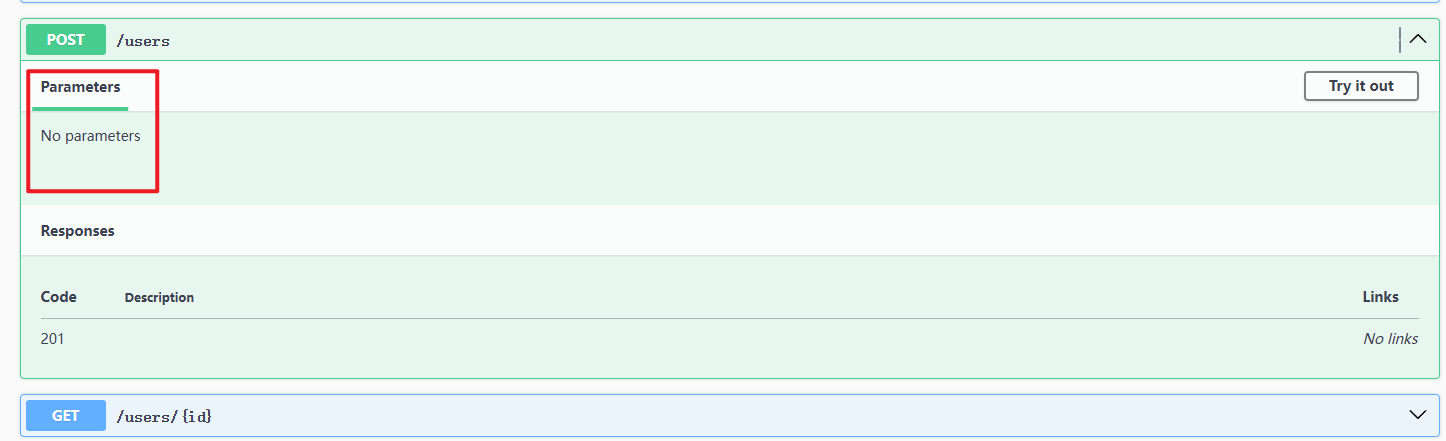
问题:使用swagger可以直接测试接口,对于GET请求来说,似乎没什么问题,但对于POST接口,我们展开标签,发现其中缺少参数提示信息:
6.集成 DTO:规范请求参数与文档
为了让 Swagger 文档更完整,并规范前端传递的参数,我们需要引入 DTO(数据传输对象)。
DTO 是什么?(数据传输对象)
DTO 在 NestJS 中扮演三大角色:
- 数据安检员:校验前端传递的数据格式(如用户名必须为字符串、邮箱格式必须正确)
- 数据快递员:控制后端返回的字段(隐藏密码等敏感信息)
- 协作翻译官:统一前后端数据格式认知,自动生成文档说明
6.1 安装依赖
6.2 全局启用 DTO 验证
1
2
3
4
5
6
7
8
9
10
11
12
13
14
15
16
17
18
19
20
21
22
23
24
25
26
27
28
29
30
31
32
|
import { NestFactory } from '@nestjs/core';
import { AppModule } from './app.module';
import { SwaggerModule, DocumentBuilder } from '@nestjs/swagger';
import { ValidationPipe } from '@nestjs/common';
async function bootstrap() {
const app = await NestFactory.create(AppModule);
const config = new DocumentBuilder()
.setTitle('API文档')
.setVersion('1.0')
.build();
const documentFactory = () => SwaggerModule.createDocument(app, config);
SwaggerModule.setup('swagger', app, documentFactory);
app.useGlobalPipes(
new ValidationPipe({
whitelist: true,
forbidNonWhitelisted: true,
transform: true,
transformOptions: {
enableImplicitConversion: true
}
})
);
await app.listen(process.env.PORT ?? 3000);
}
bootstrap();
|
6.3 定义 DTO 类
1
2
3
4
5
6
7
8
9
10
11
12
13
14
15
16
17
18
19
20
|
import { IsString, IsEmail } from 'class-validator';
import { ApiProperty } from '@nestjs/swagger';
export class CreateUserDto {
@ApiProperty({
description: '用户姓名',
required: true
})
@IsString()
name: string;
@ApiProperty({
description: '用户邮箱',
required: true
})
@IsEmail()
email: string;
}
|
6.4 在控制器中使用 DTO
1
2
3
4
5
|
@Post()
async createUser(@Body() userData: CreateUserDto): Promise<User> {
return await this.userService.createUser(userData);
}
|
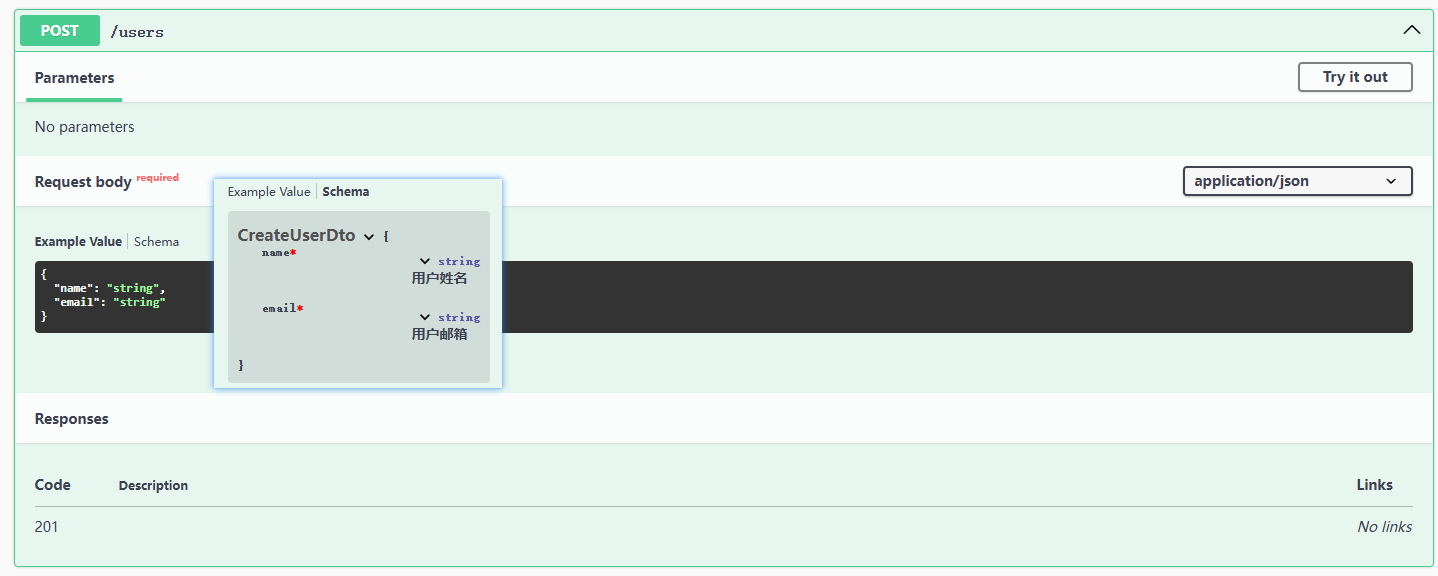
现在刷新 Swagger 页面,可以看到Swagger已经自动生成了参数说明和示例:
总结
通过这个项目,我深刻体会到了 NestJS 框架的优势:清晰的分层设计、强大的依赖注入机制、完善的 TypeScript 支持以及与各种工具的良好集成。这些特性使得 NestJS 非常适合构建中大型后端应用,能够有效提高开发效率和代码的可维护性。
如果你也在寻找一个适合企业级应用的 Node.js 框架,NestJS 绝对是一个值得考虑的选择。
参考资源:
 微信
微信 支付寶
支付寶