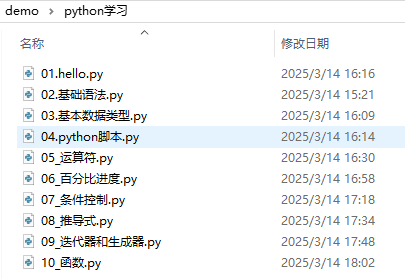
背景: 笔者最近决定开始学python,刚好在工作中遇到了地图切片下载的需求,于是就想用python实现一个切片下载的脚本,简化后续工作的同时也能顺便练习自己的python技能。笔者目前的进度如下图,还停留在语法层面。但是借助强大的AI老师,我完全有信心实现这个脚本!
项目搭建: 经过网上查询资料和询问AI,我了解到Python项目搭建分为以下几个关键步骤:
创建项目目录
创建python虚拟环境
安装需要的依赖
编写核心逻辑代码
1.创建项目目录 在一个喜欢的位置新建文件夹,用于存放python项目文件。
2.初始化python虚拟环境
什么是python虚拟环境?
虚拟环境是相对于全局环境的概念,每个项目使用的依赖都可能不一样,如果都安装在全局(也就是python的安装目录中),会造成依赖的版本混乱,所以需要每个项目都有一个独立的空间,用于存储项目的依赖,python执行时优先从项目中的依赖空间找依赖;(类似于前端项目中的node_modules目录)
创建虚拟环境有多种方式,常用的是使用Python内置的虚拟环境管理工具venv或第三方的Conda
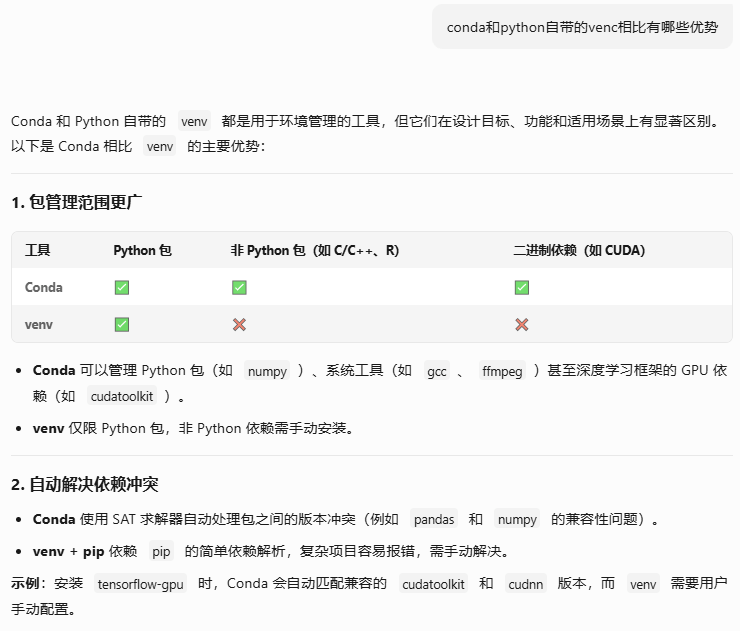
通过询问AI老师,我了解到Conda功能更强大,venv更轻量,更适合纯python项目,于是我决定使用venv
2.1使用venv创建虚拟环境 1 2 python -m venv myvenv myvenv\Scripts\active
3.安装依赖 使用pip包管理工具,依赖会记录在requirements.txt 中:
1 2 pip install requests pip freeze > requirements.txt
4.编写基础代码 根目录创建配置文件config.toml:
1 2 3 4 5 6 7 8 9 [tiles] base_url = "https://server.arcgisonline.com/ArcGIS/rest/services/World_Imagery/MapServer/tile/{z}/{y}/{x}.png" //瓦片数据源output_dir = "../tiles" //输出的目录max_level = 6 min_level = 0 [settings] max_workers = 8 timeout = 30
创建src/main.py文件,让deepseek生成脚本代码:
1 2 3 4 5 6 7 8 9 10 11 12 13 14 15 16 17 18 19 20 21 22 23 24 25 26 27 28 29 30 31 32 33 34 35 36 37 38 39 40 41 42 43 44 45 46 47 48 49 50 51 52 53 54 55 56 57 58 59 60 61 62 63 64 65 66 67 68 69 70 71 72 73 74 75 76 77 78 79 80 81 82 83 84 85 86 87 88 89 90 91 92 93 94 95 96 97 98 99 100 101 102 103 104 105 106 107 108 109 110 111 112 113 114 115 116 117 import osimport requestsimport configparserimport tomllib from concurrent.futures import ThreadPoolExecutorfrom pathlib import Pathfrom urllib.parse import urlparseCONFIG_FILE = "config.toml" def load_config (): config_path = Path(__file__).parent.parent / "config.toml" if not config_path.exists(): raise FileNotFoundError("配置文件未找到" ) try : with open (config_path, "rb" ) as f: config = tomllib.load(f) required_keys = ["base_url" , "min_level" , "max_level" ] tiles_config = config.get("tiles" , {}) if not all (key in tiles_config for key in required_keys): missing = [k for k in required_keys if k not in tiles_config] raise ValueError(f"缺少必要配置项: {missing} " ) return { "tiles" : { "base_url" : tiles_config["base_url" ], "output_dir" : tiles_config.get("output_dir" , "tiles" ), "min_level" : tiles_config["min_level" ], "max_level" : tiles_config["max_level" ] }, "settings" : { "max_workers" : config.get("settings" , {}).get("max_workers" , 8 ), "timeout" : config.get("settings" , {}).get("timeout" , 30 ) } } except tomllib.TOMLDecodeError as e: raise ValueError(f"TOML 语法错误: {e} " ) except Exception as e: raise ValueError(f"配置文件读取失败: {e} " ) def download_tile (x, y, z, config ): """ 下载单个瓦片并保存为z/x/y.png :param x: 瓦片X坐标 :param y: 瓦片Y坐标 :param z: 缩放级别 :param config: 配置字典 """ url = config["tiles" ]["base_url" ].format (z=z, x=x, y=y) output_dir = os.path.join(config["tiles" ]["output_dir" ], str (z), str (x)) os.makedirs(output_dir, exist_ok=True ) file_path = os.path.join(output_dir, f"{y} .png" ) if os.path.exists(file_path): return try : response = requests.get( url, stream=True , timeout=config["settings" ]["timeout" ] ) response.raise_for_status() with open (file_path, "wb" ) as f: for chunk in response.iter_content(chunk_size=8192 ): f.write(chunk) print (f"下载成功 z={z} x={x} y={y} " ) except requests.exceptions.RequestException as e: print (f"下载失败 z={z} x={x} y={y} : {str (e)} " ) def generate_tile_coordinates (level ): """生成指定层级的瓦片坐标范围""" return range (0 , 2 ** level) def download_all_tiles (config ): """下载所有层级的瓦片""" min_level = config["tiles" ]["min_level" ] max_level = config["tiles" ]["max_level" ] max_workers = config["settings" ]["max_workers" ] with ThreadPoolExecutor(max_workers=max_workers) as executor: for z in range (min_level, max_level + 1 ): for x in generate_tile_coordinates(z): for y in generate_tile_coordinates(z): executor.submit(download_tile, x, y, z, config) if __name__ == "__main__" : try : config = load_config() print ("配置加载成功:" ) print (f"瓦片URL模板: {config['tiles' ]['base_url' ]} " ) print (f"下载层级范围: {config['tiles' ]['min_level' ]} -{config['tiles' ]['max_level' ]} " ) print (f"并发线程数: {config['settings' ]['max_workers' ]} " ) os.makedirs(config["tiles" ]["output_dir" ], exist_ok=True ) download_all_tiles(config) print ("所有瓦片下载完成!" ) except ValueError as e: print (f"配置错误: {str (e)} " , file=sys.stderr) sys.exit(1 ) except KeyboardInterrupt: print ("\n用户中断下载" , file=sys.stderr) sys.exit(1 ) except Exception as e: print (f"程序异常: {str (e)} " , file=sys.stderr) sys.exit(1 )
5.代码块释义 if __name__ == "__main__": 是 Python 中一个非常重要的惯用写法,用于控制代码的执行方式。这段代码的意思是:
“如果当前文件是直接被运行的 (而不是被其他文件导入的),就执行下面的代码。”
两种运行python文件的方式:
直接运行(作为主程序)
__name__ 会被自动赋值为 "__main__"因此 if 条件成立,main() 函数会被执行
被其他文件导入(作为模块)
__name__ 会变成 模块名 (即 "my_script")if 条件不成立,main() 不会自动执行
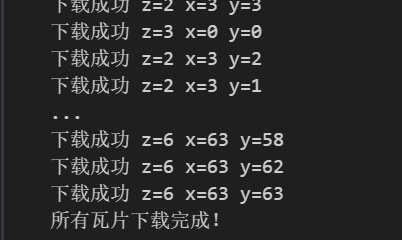
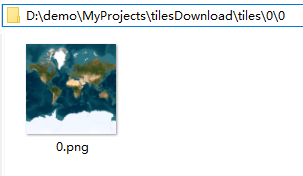
6.结果展示: 经过几次调试后成功下载6级瓦片:


